New Owners Guide
NEW OWNERS GUIDE:
1.Recharge your battery every 3 months.
2.Don't throw away your box.
We suggest flattening and storing it somewhere dry. These boxes are custom made to fit and ship your bike. Do not try to cut open the box as you could damage the bike inside. Two people are recommended for unboxing, whereas assembly but not required. It can be difficult and costly to source bike-sized boxes in the event that you need to ship your bike for any reason including:
• Recalls
• Returns
• Returns for Service
• Selling the bike
3.Take pictures of the box upon arrival and of its contents.
This way we can make a claim if there is any shipping damage. Documentation can also help in the case of missing or damaged parts upon arrival that are covered under warranty. For any warranty claims or shipping damage claims, we will request to see photos, even videos.
4.Absolutely NO hammering! Your bike doesn't come with nails.
5.Remember your KEYS!
These are the only Two Keys along with bike that match lock. Once lost, you need to wait for a long time due to it will ship from factory, even extra payment for new key. Test keys with lock BEFORE mounting battery. In the unlikely event that the lock and keys don't match, please contact support immediately. And DO NOT mount the battery.
6.Record your bike's SERIAL NUMBER. Register your bike and serial number HERE.
WHAT’S SERIAL NUMBER?
Unique serial number of frame is like a finger print, identifying the bike in the event that it is lost, stolen, or damaged.
The serial number is required for most insurance policies and claims and to identify lost or stolen bikes.
Your bike will have its serial number engraved on the frame:
on the bottom of the head tube (near the headlight)
• on the bottom of the head tube;
• under the motor;
• or on the back of the motor.
Record your Serial Number before first ride;
Order Number is on hand when contacting Support.
7.Use the QR code below for a link to our EUNORAU GO.

8.Install EUNORAU GO APP:
EBIKE ASSEMBLY:
Your bike will arrive mostly assembled. We will provide the tools and a comprehensive assembly video.
To assemble your eBike, please visit our YouTube Page, find and follow assembly instructions for your specific bike model.
STARTING TIPS
Congratulations on the purchase of your new EUNORAU eBike!
We want you to get maximum enjoyment and longevity from your new ride, so we've included a few starting tips before you hit the road:
1.Charge battery fully with the right charger in box.
2.Your new bike is a hard-working machine, and parts will wear out. For maximum chain life, pedaling should be started in a lower gear before your work the way up to a higher gear, much like an automatic transmission in a car.
3.The same principle applies to the amount of power coming from the motor to your drive chain. Start in a lower assist level to preserve the life of the chain.
4.In general, shift gears before you need to. If shift while going up a hill, relax the pressure you are putting on the pedals or throttle, shift, and then continue as normal.
5.Ensure chain is lubricated when the bike is ready to ride.
6.Make sure that stem and handlebar are properly assembled and secure. It is dangerous to bike with a loose stem and/or handlebars.
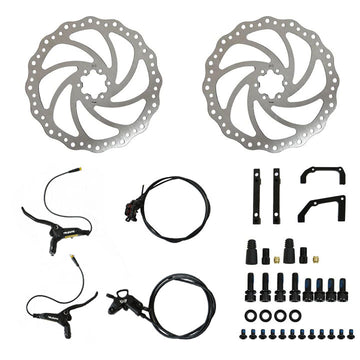
7.Your new bike is equipped with disc brakes. For maximum stopping power and minimum noise from brake system, they need to "bedded in”.
Bedding In New Brakes Procedure:
- Go to your riding location. It should be fairly level ground that you can ride straight forward unobstructed to reach a fairly low speed.
- Ride forward to reach a speed of about 15/20km/h (9/12 mph).
- Lightly apply pressure to only your REAR brake lever to slow down the bike but not completely stop. Repeat this 5 times.
- Ride forward with a bit faster speed now. Again use only your REAR brake lever and slow down the bike to a coasting speed but not completely stop. Repeat at this faster speed 5 more times.
- Now repeat the process for the FRONT brake - 5 times fast and 5 times slowly.
- After performing this for each brake your brakes should be bedded in!
PRE-RIDE
1.Fastener Check.
Check all important bolts and fasteners before riding. Including, but not limited to:
- Thru-axles
- Quick Release
- Seat post clamp
- Fender bolts
- Stem bolts
- Brake caliper bolts
- Crank bolts
- Pedals
- Rack Bolts
- Headlight
- Taillight mounting bolts
- Check Brakes: 1) Pull forward and back brake levers and confirm braking power; 2) Spin the front and back wheels to check that they spin freely and the brake rotors are not rubbing on the pads.
2.Check Tire Pressure
Ensure that tire pressure is within the guidelines printed on the sidewall of the tire
3.Check chain/drive train
- Make sure that the chain is lubricated with a chain lube and clean of debris
- Shift through the gears to check that the derailleur is adjusted properly
4.Check battery charge
Use the bike’s display to check how much charge your battery has in order to not be left without motor assist unexpectedly
POST-RIDE
-
Check the bike over for any missing parts
-
Clean the bike of dirt and debris
-
Dry bike if riding in the rain or snow, including chain and cassette
-
Recharge your battery every 3 months
